Why You'll Love It
- - Effortless preparation, just minutes on the counter
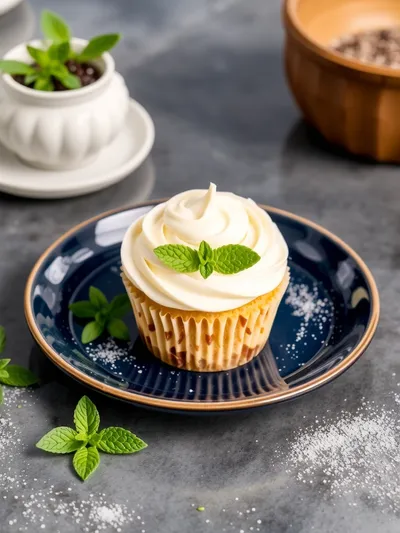
- - Sweet vanilla flavor that never overpowers
- - Smooth texture that spreads like a dream
- - Versatile for cupcakes, cookies, and cakes
*"The vanilla icing is so smooth, it turns simple cupcakes into a celebration!"*
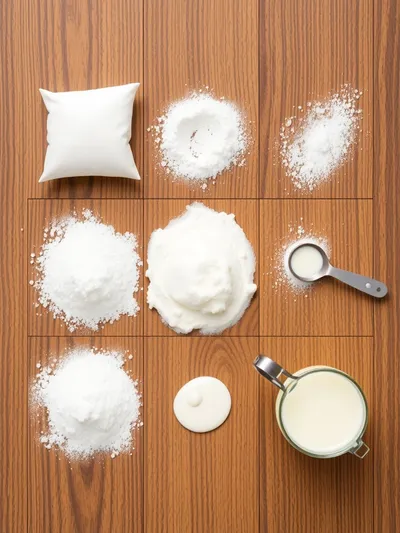
Essential Ingredient Guide
- Powdered sugar: The foundation; sift to avoid lumps and ensure a velvety finish.
- Unsalted butter: Provides richness and a buttery mouthfeel; soften before mixing.
- Pure vanilla extract: Choose a high‑quality extract for authentic fragrance and depth.
- Milk or heavy cream: Adds moisture; adjust to achieve your desired consistency.
- Salt: Just a pinch brightens the sweetness and balances flavors.
- Food coloring (optional): A few drops can create pastel hues without altering taste.
Complete Cooking Process
-
Ingredient Readiness:
Sift the powdered sugar, soften the butter, and measure liquid to ensure a lump‑free start.
-
Flavor Development:
Cream butter with sugar, then fold in vanilla, letting the aroma build gently.
-
Texture Control:
Add milk or cream gradually, watching the glaze become glossy and spreadable.
-
Finishing Touches:
Taste and adjust sweetness or thickness, then drizzle or pipe onto cooled treats.
-
Serving Timing:
Apply the icing while still slightly warm for a silky sheen; let it set briefly before serving.
- Use room‑temperature butter for a smoother blend.
- Add milk a teaspoon at a time to avoid over‑thinning.
- If icing is too thick, whisk in a few drops of extra vanilla extract.
- For a glossy finish, beat the icing on high for 30 seconds.
Pro Tips
I often find a moment of calm while the whisk spins, the scent of vanilla wrapping the kitchen like a soft blanket. Take the time to taste; a tiny tweak can turn good into unforgettable. Remember, the icing will firm slightly as it cools, so the texture you see in the bowl is the perfect spreadable state.
The essence of the dish:
A fun fact or historical angle:
Flavor or sensory focus:
You Must Know
- Use sifted sugar to avoid grainy patches.
- Keep butter soft, not melted.
- Adjust liquid slowly for perfect consistency.
Frequently Asked Questions
→ Can I make this icing ahead of time?
Yes, store it in an airtight container in the refrigerator for up to three days; whisk gently before using.
→ What if the icing is too thin?
Add a bit more powdered sugar, a tablespoon at a time, until the desired thickness is reached.
→ Can I use a plant‑based butter?
Absolutely; a good quality vegan butter works the same, keeping the flavor rich.
→ How long does it keep at room temperature?
Best kept cool; at room temperature it stays fresh for about two hours before it may soften.
→ Is this recipe gluten‑free?
Yes, all ingredients are naturally gluten‑free.
→ Can I add color without affecting flavor?
A few drops of gel food coloring give vibrant hues without altering taste.
Chef's Tips
For a glossy finish, let the icing sit for a minute before spreading.,If the icing becomes too thick, add a few drops of milk and whisk briefly.,A tiny pinch of sea salt can heighten the vanilla sweetness.
Nutrition Facts
per serving
210
Calories
1g
Protein
42g
Carbs
5g
Fat
Taste Profile
A sweet, buttery vanilla glaze with pure dairy richness.
Ingredient Substitutions
Don't have an ingredient? Try these alternatives
Maintain the same amount; the flavor will be slightly different.
Use a thicker alternative like coconut cream for richer texture.
Recipe Variations
Try these delicious twists on the original
Spicy Version
Add a pinch of cinnamon or a dash of ground cardamom for warm spice notes.
Mediterranean Style
Stir in a touch of orange zest and a drizzle of honey for a fragrant twist.
Common Mistakes to Avoid
Learn from others' mistakes for perfect results
- Adding all the milk at once, causing a runny glaze.
- Skipping the sift, leading to grainy texture.
- Using cold butter, which creates lumps.
Meal Prep & Storage
Make Ahead Tips
You can whisk the icing ahead and store it sealed in the refrigerator for up to three days; simply bring to room temperature and give a quick stir before using.
Leftover Ideas
Refrigerate any leftover icing; gently warm and whisk before spreading on a new batch.
Perfect Pairings
Serve this with...
Cooking Timeline
Sift sugar and soften butter.
Cream butter and sugar together until light.
Add vanilla, salt, and liquid gradually.
Adjust consistency, add optional color, and finish.
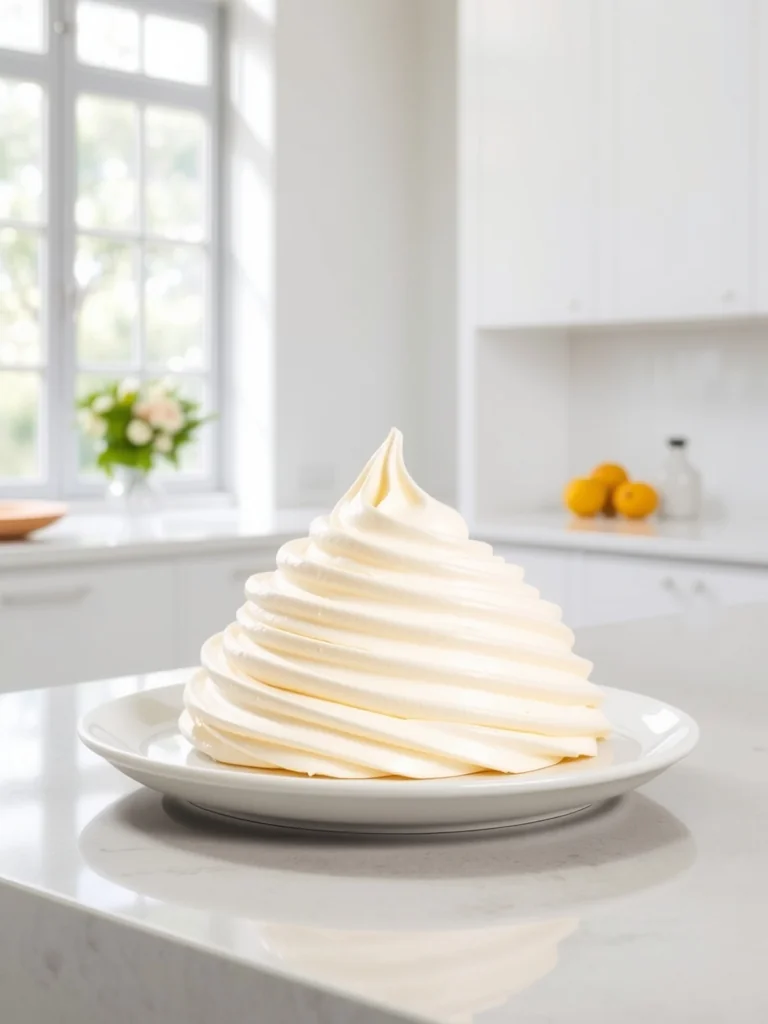
Vanilla Icing – Quick & Easy Powdered Sugar Recipe
Create a smooth, sweet vanilla icing with powdered sugar – perfect for cupcakes, cookies, and cakes. Quick, easy, ready in minutes.
Timing
Prep Time
10 Minutes
Cook Time
5 Minutes
Total Time
15 Minutes
Recipe Details
Ingredients
Main Ingredients
- 01 2 cups powdered sugar, sifted
- 02 2 tbsp unsalted butter, softened
- 03 1 tsp pure vanilla extract
- 04 2‑3 tbsp milk or heavy cream
- 05 Pinch of salt
Optional Add‑Ins
- 01 Few drops of gel food coloring
- 02 1 tsp orange zest for a citrus twist
Instructions
In a medium bowl, sift the powdered sugar to remove any lumps.
Add the softened butter and beat on medium speed until light and fluffy, about 1‑2 minutes.
Stir in the vanilla extract and a pinch of salt, mixing until fully incorporated.
Gradually drizzle in the milk or cream, beating after each addition, until the icing reaches a smooth, spreadable consistency.
If desired, blend in food coloring or orange zest for a subtle flavor boost.
Taste and adjust sweetness or thickness as needed, then spread or pipe onto cooled pastries.
Notes & Tips
- 1 For a glossy finish, let the icing sit for a minute before spreading.
- 2 If the icing becomes too thick, add a few drops of milk and whisk briefly.
- 3 A tiny pinch of sea salt can heighten the vanilla sweetness.
Tools You'll Need
-
Mixing bowl
-
Hand or electric mixer
-
Sieve for powdered sugar
-
Spatula
-
Measuring spoons
Must-Know Tips
- Don’t over‑mix; the icing can become too airy.
- Use room‑temperature butter for smoothness.
- Add liquid slowly to control thickness.
Professional Secrets
- Sift sugar for a lump‑free texture.
- Cream butter until it’s pale and airy for better incorporation.
- Finish with a quick high‑speed whisk for extra shine.

Recipe by
EvaEva is a seasoned home‑cook turned recipe developer who brings a dash of curiosity and a pinch of precision to every dish she creates for Your Website ...
Get Delicious Recipes Weekly
Join 25,000+ home cooks getting our best recipes straight to their inbox.
Free forever • No spam • Unsubscribe anytime